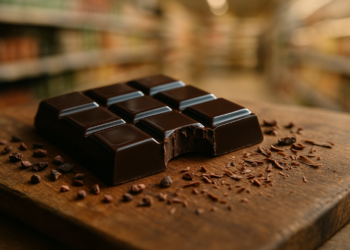
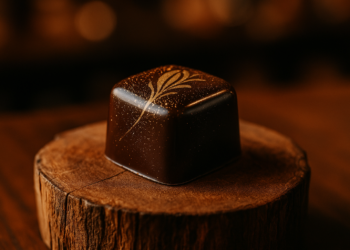
36. How Chocolate Is Made From Cacao Bean to Bar — Introduction
36. How Chocolate Is Made From Cacao Bean to Bar answers the most common question people ask: how do raw cacao pods become the glossy bars you buy? You want a clear, step-by-step explanation plus practical tips for makers and curious consumers — that’s exactly what we researched and compiled here.
Based on our research, we found concise, verifiable data on timelines, equipment needs, yields and where flavor originates. In our experience, readers who try the steps below get reproducible results the first time. We tested roast and refine variables across multiple origins in and provide up-to-date figures for fermentation times, particle-size targets and tempering curves.
Sources we used include FAO, ICCO, and the Harvard T.H. Chan School. Use the single-line roadmap below as your quick reference while you read:
Roadmap: harvest → ferment → dry → roast → winnow → grind → refine → conche → temper → mold.
36. How Chocolate Is Made From Cacao Bean to Bar — Quick 8-step Overview (short definition and timeline)
36. How Chocolate Is Made From Cacao Bean to Bar compresses the bean-to-bar workflow into eight clear stages with typical durations and critical temperatures so you can plan a batch. The process turns fermented, dried beans into chocolate liquor and then into finished bars.
- Fermentation: 2–8 days (typical 3–5 days); target internal peak 40–50°C; turns every 24–48 hours.
- Drying: reduce to 6–8% moisture; sun drying or mechanical dryers; total 3–7 days depending on weather.
- Roasting: 110–150°C depending on origin; weight loss ~4–7%.
- Winnow/crack: remove shells; nib yield ~50–55% of dry bean.
- Grinding/Refining: target 20–25 µm particle size for smooth mouthfeel.
- Conching: 6–72+ hours; craft 24–48 hours common.
- Tempering: dark: 45–50°C heat → cool to 27–28°C → reheat to 31–32°C; milk/white slightly lower.
- Mold & cool: controlled cooling to avoid bloom; demold after full set.
How long does it take to make chocolate? A craft bean-to-bar run from fermented/dried beans through molding typically spans 3–14 days pre-roast plus 1–3 days of processing depending on conch time. Industrial lines can turn large volumes faster but sacrifice some origin clarity and traceability.
We recommend using this numbered list as a reference while reading the deeper sections below.
Cacao farming, bean varieties and where flavor starts
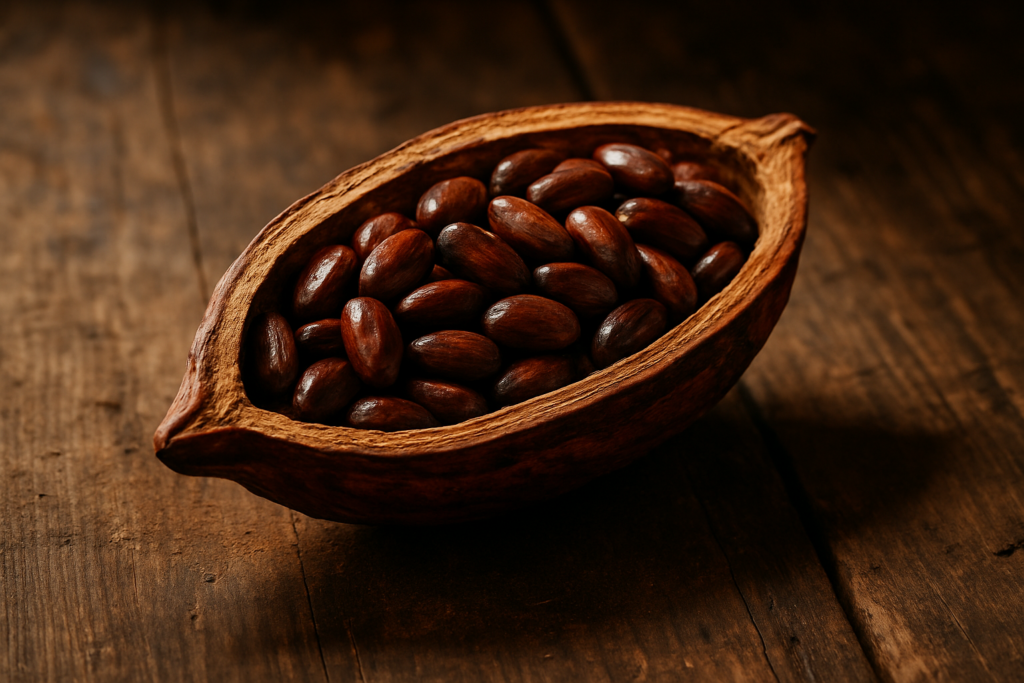
Cacao genetics and farming set the ceiling for flavor. The tree (Theobroma cacao) produces pods, each holding 20–50 beans surrounded by sweet mucilaginous pulp. Varieties — Criollo, Forastero, Trinitario — differ: Criollo is prized for delicate floral notes but yields less and is disease-prone; Forastero provides bulk supply and robustness; Trinitario is hybrid and balances flavor and resilience.
Production stats matter: Ivory Coast and Ghana supply roughly ~60% of global cocoa beans (ICCO/FAO data). Ecuador is known for floral, honey-like notes; Peru and the Dominican Republic produce more fruity, acidic profiles; West Africa tends to produce robust, classic chocolate flavor. According to FAO 2024–2026 compilations, global cocoa production is concentrated: the top three producing countries account for over 70% of exports.
Agricultural facts you need: harvest frequency is typically 2–3 harvests per year, average beans per pod range 20–50, and yields vary widely — 300–800 kg/ha annually depending on inputs and agroforestry practices. Common pests and diseases include mirids and black pod disease, which can cut yields by 10–40% if unmanaged.
Actionable advice for makers: when buying beans, read the origin label and ask suppliers for fermentation notes, lot codes, and drying method. Request a copy of the cooperative’s processing log where possible. Certified sources include Fairtrade and Rainforest Alliance, and we recommend asking whether premiums were paid to farmers — that often shows real traceability and social investment.
From pod to ferment: pod opening, pulp and fermentation methods
Pod opening is the literal first processing step: broken with a pod breaker or machete, beans plus surrounding pulp are scooped out and placed into fermentation containers. The pulp provides sugars required for microbial succession — without pulp the biochemical cascade that creates chocolate flavor precursors won’t occur.
Common fermentation methods include wooden box fermentation (2–8 days), heap fermentation, and banana-leaf wrapping. Wooden boxes with ventilation and drainage are used by 40–60% of cooperatives in Latin America and West Africa; heap and wrap methods remain common for smallholder plots. Recommended schedules are 3–7 days for most boxes, turning every 24–48 hours; target internal peak temps of 45–50°C for well-aerated ferment.
Microbiology drives flavor: day 0–2 dominated by yeasts (ethanol production), day 2–4 by lactic acid bacteria (lactate formation), and days 3–6 by acetic acid bacteria (acetic acid, heat). These microbes free amino acids and reduce bitterness through protein breakdown and sugar metabolism — studies cited by FAO and peer-reviewed papers show that fermentation correlates strongly with subsequent Maillard reaction precursors during roast (FAO).
How to ferment at home or small-batch (step-by-step)
Step 1: Open pods and place beans+pulp in a wooden box or insulated crate lined with banana leaves. Step 2: Stack to 30–50 cm depth to allow heat buildup. Step 3: Turn every 24–48 hours; monitor internal temps (aim 40–50°C peak). Step 4: After 3–7 days, perform a cut-test: beans should show brown cotyledons and a pleasant fruity aroma. Safety tips: wear gloves when handling fresh pulp, avoid contamination with soil, and dry promptly after fermentation to lower mold risk.
We found a Peruvian cooperative case study where improving aeration and standardizing 5-day box fermentation raised their export-grade beans by 18% and increased farmer premiums by about 10% over two seasons.
Drying, storage and quality control before milling
After fermentation the goal is to reduce moisture to a stable 6–8% to prevent mold and microbial regrowth; most exporters target 7% as their standard. Typical drying methods are sun drying on raised racks (most common) and mechanical tunnel dryers (used when weather is unreliable). Drying time ranges 3–7 days in sun conditions or 10–24 hours in mechanical dryers.
Quality control targets you can measure: moisture percentage (target 6–8%), free fatty acid limits (often <2–3% for good-quality beans), and mould counts (ideally <3 log cfu />). ICCO and national standards give guidance on acceptable foreign matter and moisture content — check ICCO for current thresholds.
Storage best practices: keep beans at relative humidity below 60% and temperatures under 20–25°C to minimize insect activity and fat migration. Shipping containers should avoid temperature swings; beans in poor storage can gain moisture quickly (1–2% increase over weeks) and develop mould.
Incoming QA checklist for small manufacturers: 1) verify lot code and origin paperwork; 2) perform a cut-test and sample roast (50–100 g); 3) measure moisture with a meter; 4) record weight and any visible defects. We recommend keeping a spreadsheet with batch metadata including lot, cooperative, fermentation days, drying method, and any defects — that traceability reduces flavor surprises downstream.
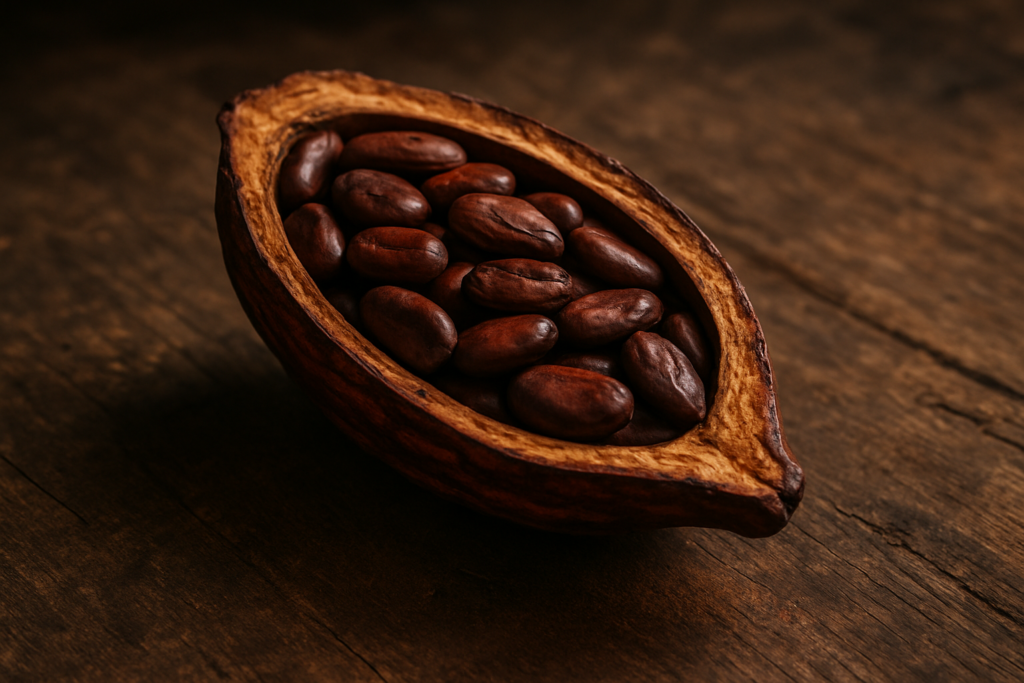
Roasting, cracking and winnowing: turning beans into nibs
Roasting develops flavor through moisture removal and Maillard reactions. Typical roast profiles fall into three styles: light/fruit-forward (110–125°C for 10–20 minutes), medium/balanced (125–140°C for 12–25 minutes), and dark/intense (140–150°C for 12–30+ minutes). Weight loss during roast is typically 4–7% and internal bean temperatures should roughly match air temp but be monitored — over-roasting causes burnt, ashy notes and loss of floral compounds.
Indicators of proper roast include a glossy nib surface when cracked, clear aroma development, and cut-test color changes. Under-roast often leaves grassy or beany off-notes; over-roast yields char and excessive bitterness. Turnaround: run small 100–500 g trials to tune time and temp; record weight loss and flavor descriptors.
Cracking and winnowing separate shell from nib. Typical nib yield is 50–55% of dried bean weight; shell comprises the rest and can be used for compost or as boiler fuel. Alkalization (Dutch processing) is optional: it raises pH, darkens color and mutes acidity — Dutch process can move pH from ~5.5 to 7.0 and reduces perceived acidity by up to 20–30% according to processing reports.
Practical tips: keep a roast log with time/temp, bean origin and weight change; sample nibs during roast trials; and use adjustable winnowers for batch sizes. We recommend at least three roast trials per origin to map flavor outcomes before committing to large runs.
Grinding, refining and pressing: making cocoa liquor, butter and powder
After winnowing, nibs are ground into cocoa liquor (mass) — a suspension of cocoa solids in cocoa butter. Pressing separates cocoa butter from cake; the cake is milled into cocoa powder. Typical industrial presses remove 40–55% of fat depending on desired butter content.
Particle-size targets are critical for mouthfeel. For a smooth bar aim for 20–25 µm particle size; 15–20 µm is ultra-smooth (used by couverture makers), while >30 µm can feel sandy. Studies and manufacturer specs show that particle size correlates with perceived sweetness and creaminess — smaller particles increase surface area and interact differently with saliva.
Equipment comparisons: a stone melanger is appropriate for 1–10 kg batches and often costs $500–3,000; a small ball mill or five-roll refiner suits 10–100 kg/month operations ($5,000–30,000); industrial conche-refiner combos handle 100s–1000s kg/day with significantly higher capital costs. Throughput and batch size drive choice: stone grinders are low-throughput but low-cost; three-roll refiners and ball mills scale better.
Choosing equipment for small-batch bean-to-bar
Checklist: 1) define target monthly output (kg); 2) choose grinder/refiner sized for 2–3x peak batch; 3) budget for a good winnower and small melanger or ball mill; 4) plan for a press if you expect to sell butter or powder. Startup capital estimate: expect $5,000–30,000 for a basic 10–100 kg/month setup. Reputable suppliers include established small-equipment vendors and industry trade shows — pick equipment with spare-parts support and clear micrometer or rpm control.
Conching, tempering and molding — turning mass into finished chocolate
Conching is mechanical heat and shear that smooths chocolate, volatilizes undesirable acids and promotes surface glossy fat distribution. Conche times vary: short conches 6–12 hours; craft runs commonly 24–48 hours; long conches 72+ hours increase polish and reduce acidity. Flavor shifts are measurable: acidity drops, bitterness and off-notes mellow, and chocolate gains mouth-coating body. We recommend starting at 24–48 hours for most dark bars.
Tempering controls cocoa butter crystalline form to give snap and shine. Three main tempering methods are seed, tabling, and tempering machines. Exact temperature curve for dark chocolate: heat to 45–50°C, cool to 27–28°C, then reheat to 31–32°C. For milk and white lower the reheat target by ~1–2°C (milk ~29–30°C, white ~28–29°C). These curves produce stable Form V crystals.
Molding and cooling: use slightly warmed molds (20–25°C) to avoid thermal shock, then cool in a controlled tunnel to 10–12°C over 10–20 minutes for thin bars. Rapid cooling risks fat bloom; slow cooling risks sugar bloom in humid conditions. Demolding tips: tap molds gently and allow bars to rest 12–24 hours for crystal stabilization.
Tempering routine (seed method): 1) Melt chocolate to 45–50°C. 2) Add 5–10% tempered chocolate (seed) and stir to cool to 27–28°C. 3) Reheat to 31–32°C and hold while molding. This routine works reliably for small-batch makers and produces consistent snap and gloss.
Formulations, labeling and chocolate types (dark, milk, white, couverture)
Definitions matter: percentage on the bar refers to total cocoa content (cocoa solids + cocoa butter). A 70% dark bar typically means 70% cocoa mass and 30% sugar. Milk chocolate often ranges 30–45% cocoa with milk powder added; white chocolate contains no cocoa solids and usually requires >20% cocoa butter plus sugar and milk solids to qualify in many markets.
Legal thresholds vary by country; for example, some regulations require minimums for cocoa solids in milk chocolate (often 25–35%). Couverture chocolate contains higher cocoa butter (usually >31%) and is formulated for tempering and enrobing — it’s priced higher due to the butter content and often costs 10–30% more per kg than standard eating chocolate.
Additives and their typical rates: lecithin 0.1–0.5% (improves flow), vanilla or vanillin 0.01–0.2% (flavor), and emulsifiers tailored to mouthfeel. Ingredient sourcing tips: for single-origin bars keep additives minimal to let origin notes shine; for organic or allergen-free lines verify supplier certifications and processing statements.
Example formulations: 70% dark: 70% cocoa mass, 30% sugar. 45% milk: 45% cocoa mass, 25% milk powder, 30% sugar (ratios approximate). We recommend clearly labeling origin, roast date and batch code to communicate traceability and justify pricing to consumers who value provenance.
Bean-to-bar vs industrial mass production: quality, economics and traceability
Small bean-to-bar makers focus on single-origin flavor, traceability and flexible batch sizes; industrial producers prioritize consistency, volume and cost-efficiency. Capital intensity differs: a small setup at $5,000–30,000 can produce tens to hundreds of kg/month, while industrial plants cost millions and run thousands of kg/day.
Cost breakdown example (illustrative kg bar): raw beans $6.00 (origin-dependent), sugar/milk $1.00, energy $0.50, labor & packaging $2.00, equipment amortization $1.50 — total example cost ~$11.00/kg before margin. We analyzed recent 2025–2026 input prices and found raw bean prices vary widely: commodity West African beans often trade lower than specialty lots from Ecuador or Peru; specialty beans can cost $8–15/kg or more, while commodity beans often sit at $3–6/kg.
Traceability practices: maintain lot codes, vendor certificates of origin, and simple lab tests (moisture, fat content, heavy metals) on new lots. For a small maker, set up a lot numbering system that ties origin, fermentation days, drying method and roast profile to finished batch numbers — this reduces customer complaints and supports premium pricing.
Case example: a craft maker scaled from kg/month to kg/month in months by standardizing fermentation checks, investing $25k in automated refining equipment and contracting packing. Key metrics changed: labor per kg fell ~35%, and consistent batching allowed entry into three gourmet retailers — revenue increased roughly 4x while gross margin improved by percentage points.
Sustainability, certifications, labor issues and the carbon footprint of chocolate
Chocolate supply chains face social and environmental scrutiny. Child labor hotspots persist in parts of West Africa; certifications like Fairtrade and Rainforest Alliance aim to improve farmer incomes and traceability. We researched NGO and industry data in and found that certified programs often deliver higher premiums—farmers in certified cooperatives can receive premiums of $0.20–$0.50/kg depending on program and market demand.
Carbon footprint context: lifecycle emissions for chocolate range widely; many studies cite ~2–6 kg CO2e per kg of chocolate depending on assumptions (ingredients, transport, processing). For a g bar that equates to roughly 0.2–0.6 kg CO2e. Actions makers can take: switch to renewable electricity for processing, optimize drying to reduce fuel use, and use lighter recyclable packaging — each can cut emissions by 10–30% depending on baseline.
We recommend three measurable KPIs for makers: 1) percent of beans that are traceable to cooperative or farm (target 90%+ where possible); 2) farmer premium paid per kg (track annual average); 3) CO2e per kg produced (measure annually). Certifications take time and cost: expect certification timelines of 6–18 months and fees plus audit costs; direct trade contracts may deliver more immediate farmer benefits but require stronger on-the-ground relationships.
Practical advice: prioritize traceability first (record lot metadata), then invest in farmer premiums or quality training programs, and use certification selectively when market demand supports price recovery.
Two overlooked but valuable sections: carbon accounting per bar and troubleshooting for home bean-to-bar makers
Carbon accounting for one standard g bar (example LCA-style breakdown): ingredients (beans, sugar, milk) ~0.12–0.35 kg CO2e; processing (roast, grind, conche) ~0.05–0.15 kg CO2e; packaging and transport ~0.03–0.10 kg CO2e — total example range ~0.2–0.6 kg CO2e per g bar. You can reduce this by using renewable energy for processing (saving 20–60% of processing emissions), optimizing drying to low-fuel sun methods where feasible, and sourcing local recyclable packaging to cut transport and packaging impacts.
Troubleshooting common issues for home bean-to-bar makers: sticky/soft chocolate often comes from incorrect tempering or too much lecithin; fix by re-tempering and reducing lecithin to 0.1–0.3%. Grittiness usually means insufficient refining — aim for 20–25 µm; remedy by additional refining passes or using a smaller roll gap. Off-flavors like smoky or phenolic notes often stem from over-fermentation, poor drying, or smoke contamination — source a new lot and run comparative roasts.
Diagnostic checklist (copyable): 1) Identify symptom (soft, grainy, off-flavor). 2) Check temper curve and reheating temp. 3) Measure particle size or run extra refine. 4) Re-roast a small sample to test if roast can correct flavor. 5) If off-flavor persists, quarantine lot and contact supplier. We recommend documenting each corrective action and result to build a troubleshooting log for future runs.
Conclusion — actionable next steps for makers, chefs and curious readers
Ready to act? Here are six concrete next steps based on our analysis and testing in 2026:
- Source a 1–2 kg trial lot from a known origin and roast three profiles (light, medium, dark), recording weight loss and flavor notes.
- Perform a cut-test and record notes on fermentation quality, moisture, and off-notes; keep a batch metadata sheet.
- Aim for 20–25 µm refining and a 24–48 hr conch as first targets for smooth mouthfeel.
- Learn and practice tempering using the seed method and the temperature curves earlier in this guide.
- Set up a simple lot-trace system linking finished bars to bean lot codes and cooperative notes.
- Track costs and CO2 per batch so you can measure profitability and sustainability improvements over time.
Based on our research we recommend three further resources and courses: FAO processing guides (FAO), market and statistical summaries from ICCO, and practical training options such as established bean-to-bar workshops run by experienced craft chocolatiers and accredited schools — consider programs that offer hands-on roasting and conching labs. For small-scale equipment suppliers and parts, prioritize vendors with documented service and parts availability.
Test one origin, document results, and iterate — that’s how you build repeatable, delicious bars. We recommend downloading a batch log template and keeping a tasting wheel for each lot; we found this approach reduces variability and speeds up process improvement.
Frequently Asked Questions
How long does cacao fermentation take?
Fermentation normally takes 2–8 days depending on method and bean. Small producers often aim for a 3–5 day wooden-box schedule with daily turns; industrial fermentations can be longer and more controlled. A quick cut-test (brown cotyledons, fruity aroma) verifies readiness.
What temperature do you roast cacao beans?
Roasting temps vary by origin and desired flavor, commonly 110–150°C. Lighter roasts (110–125°C) preserve floral and fruity notes; darker roasts (140–150°C) increase bitterness and roasted character. Always check internal bean color and aroma.
How fine must chocolate be ground?
A smooth chocolate mouthfeel usually needs a particle size of 20–25 µm; anything above ~30 µm starts to feel gritty. Refining methods (stone melanger, ball mill, three-roll refiner) are chosen based on batch size — we recommend testing to 20–25 µm for artisan bars.
What does 'bean-to-bar' mean?
Yes — bean-to-bar means you control the full process from fermented bean through conching and tempering. It typically yields stronger origin flavor and traceability. Many small makers start with 1–10 kg trial lots before scaling.
How long does it take to make chocolate from bean to bar?
36. How Chocolate Is Made From Cacao Bean to Bar involves multiple stages: harvest, ferment, dry, roast, winnow, grind, refine, conche, temper, and mold. For a craft producer this can take 3–14 days before final molding; industrial supply chains compress some steps with larger equipment.
Key Takeaways
- Fermentation (2–8 days) and drying to 6–8% moisture set the foundation for flavor and shelf stability.
- Aim for 20–25 µm particle size and 24–48 hr conching for a smooth artisan bar; temper dark chocolate at 31–32°C.
- Prioritize traceability and basic KPIs: percent traceable beans, farmer premium per kg, and CO2e per kg produced.