Want to impress your friends and family with homemade chocolate truffles that taste like they were crafted by a professional chocolatier? Look no further! This article will guide you through the steps of creating decadent chocolate truffles in the comfort of your own kitchen. With simple ingredients and easy-to-follow instructions, you’ll be rolling smooth and creamy truffles in no time. So, put on your apron, grab your favorite chocolate, and get ready to become a truffle-making expert!
Equipment and Ingredients
Choosing the right chocolate
When it comes to making delicious chocolate truffles, choosing the right chocolate is crucial. Opt for high-quality chocolate with at least 70% cocoa content for that rich and indulgent flavor. You can choose between dark, milk, or white chocolate, depending on your preference. Different brands may have slightly different flavors and textures, so don’t be afraid to experiment and find your favorite!
Selecting the perfect filling
The filling is what takes your truffles to the next level, so it’s essential to select the perfect ingredients. Some popular options include ganache, nut butter, caramel, or fruit puree. Consider the flavors you want to incorporate and choose complementary fillings accordingly. For example, a dark chocolate truffle could be paired with a rich espresso ganache, while a milk chocolate truffle could be filled with a creamy peanut butter filling.
Essential equipment for making truffles
To make truffles like a pro, you’ll need a few essential equipment items. Firstly, you’ll need a double boiler or a heatproof bowl to melt your chocolate. A good quality whisk or spatula will come in handy for stirring and blending. A sturdy baking pan or dish is necessary for chilling and setting the truffles. Lastly, don’t forget about a wax paper or parchment paper for easy cleanup and storage. These tools will ensure a smooth process and professional-looking truffles!
Tempering the Chocolate
Understanding the importance of tempering
Tempering chocolate is a crucial step in making truffles that have a beautiful shine, a smooth texture, and a satisfying snap. By tempering the chocolate, you are aligning the cocoa butter crystals into a stable form, which prevents the chocolate from developing a dull appearance and a soft, grainy texture. Tempering also ensures that the chocolate will set properly and have a longer shelf life.
Methods for tempering chocolate
There are several methods you can use to temper your chocolate, depending on your available equipment and personal preference. One common method is the “seed” or “tabling” method, where you melt most of the chocolate and then add small pieces of unmelted chocolate to lower the temperature and encourage the formation of stable cocoa butter crystals. Another method is the “tempering machine” method, where specialized equipment helps automate the tempering process. Alternatively, you can also temper chocolate using the microwave or the sous vide method.
Tips for successful tempering
Tempering chocolate can be a bit tricky, but with the right tips, you’ll be able to achieve perfect results every time. First and foremost, make sure your working environment is cool and dry, as humidity can negatively affect the tempering process. Use a reliable thermometer to monitor the chocolate’s temperature and avoid overheating or cooling it too quickly. Lastly, be patient and follow the instructions closely. Practice makes perfect, and with experience, you’ll become a pro at tempering chocolate for your truffles.
Preparing the Filling
Exploring different filling options
The filling is where you can get creative and explore various flavor combinations for your truffles. Consider different types of ganache, such as dark chocolate, white chocolate, or even flavored ganache like coffee or raspberry. Experiment with crushed nuts, cookie crumbs, or dried fruit to add texture and depth to your fillings. Don’t be afraid to think outside the box and try unique flavor pairings like lavender and white chocolate or sea salt and caramel.
Preparing the filling ingredients
Once you’ve decided on your desired filling, it’s time to prepare the ingredients. For ganache-based fillings, you’ll need high-quality chocolate, heavy cream, and any additional flavorings or liqueurs. Heat the cream until it’s hot but not boiling, and then pour it over the chopped chocolate. Let it sit for a few minutes to allow the chocolate to melt, and then whisk until smooth and well combined. For other fillings, follow specific recipes and instructions to ensure optimal results.
Blending and flavoring the filling
After preparing the basic filling, it’s time to take it to the next level by adding additional flavors and textures. You can incorporate different extracts like vanilla or almond to enhance the overall taste. For a crunchier texture, mix in crushed nuts or cookie crumbs. If you’re feeling adventurous, try adding a dash of spicy chili powder or a sprinkle of sea salt to create a unique and unforgettable flavor profile. Be sure to taste and adjust the filling as needed before moving on to the next step.

Assembling the Truffles
Shaping the truffle centers
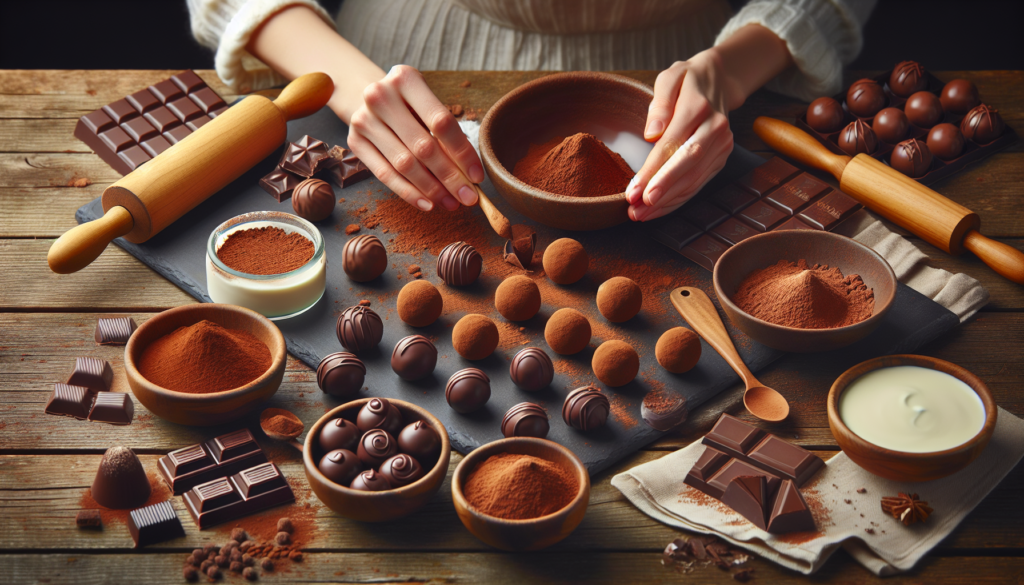
Now that you have your filling prepared, it’s time to shape the truffle centers. Using a small cookie scoop or a spoon, portion out equal amounts of the filling onto a baking sheet lined with wax paper or parchment paper. Roll each portion gently between your palms to form a smooth, round ball. If you want to get creative, you can also experiment with different shapes, such as squares or hearts, using silicone molds or by hand-carving the centers.
Coating the centers in chocolate
To give your truffles their signature chocolate coating, you’ll need to melt your tempered chocolate. Dip each truffle center into the melted chocolate, ensuring that it’s fully coated. Use a fork or a chocolate dipping tool to remove any excess chocolate and transfer the coated truffle back to the baking sheet. Once all the truffles are coated, place them in the refrigerator or the freezer to allow the chocolate to set completely.
Decorating and finishing touches
To give your truffles an extra touch of elegance, consider decorating them with various toppings. You can sprinkle them with cocoa powder, powdered sugar, or finely chopped nuts for a classic look. For a more sophisticated touch, drizzle melted white or dark chocolate over the truffles or dust them with edible gold or silver dust. Experiment with different decorations to create visually appealing truffles that are as stunning as they are delicious.
Troubleshooting and Tips
Common issues when making truffles
Making truffles can be a delightful experience, but sometimes you may encounter a few challenges along the way. One common issue is chocolate that doesn’t have a shiny appearance after setting. This could be due to improper tempering or chocolate that has come into contact with water. Another issue is fillings that are too soft or runny, which can make shaping and coating the truffles difficult. To address these problems, ensure proper tempering techniques and adjust filling ratios as needed.
Tips for achieving professional results
To achieve professional-looking truffles, attention to detail is key. Start by using high-quality ingredients and equipment. Temper your chocolate correctly to ensure a smooth and shiny finish. When shaping the truffle centers, aim for consistency in size and shape to create a polished presentation. Coating the truffles in a seamless layer of chocolate requires a gentle touch and patience. Lastly, pay attention to the final decorations and ensure they enhance the overall appearance without overpowering the truffle itself.
Storing and serving your homemade truffles
Once your truffles have set, it’s important to store them properly to maintain their freshness and quality. Place them in an airtight container or a candy box lined with wax paper and store them in a cool, dry place. Truffles are best served at room temperature, so take them out of the refrigerator or freezer a few minutes before serving to allow them to soften slightly. Arrange them on a beautiful platter or package them in individual boxes for a thoughtful gift or a delightful treat for yourself.
Flavor Variations
Classic chocolate truffle variations
While classic chocolate truffles are undeniably delicious, there are countless variations you can explore to elevate your truffle game. Add a touch of liqueur such as Grand Marnier, Irish cream, or hazelnut liqueur to infuse your truffles with an elegant and boozy flavor. Experiment with different coatings like crushed cookies, shredded coconut, or colorful sprinkles. You can also try incorporating different spices or extracts like cinnamon, peppermint, or orange zest for a burst of unique and delightful flavors.
Creative and experimental flavor combinations
If you’re feeling adventurous, don’t be afraid to explore creative and experimental flavor combinations for your truffles. Consider pairing dark chocolate with balsamic vinegar for a tangy twist, or white chocolate with rosewater for a fragrant touch. Incorporate unexpected ingredients like matcha powder, lavender, or even chili peppers for a truly unique truffle experience. With imagination and a sense of culinary curiosity, you can create truffles that are not only delicious but also unexpected and unforgettable.
Nut-Free and Vegan Options
Substitutes for nuts in truffle recipes
For those with nut allergies or dietary restrictions, there are plenty of options to enjoy truffles without nuts. Instead of using ground nuts in your filling, you can substitute them with crushed cookies, oats, or even puffed rice. These alternatives will provide similar texture and add depth to your truffles without compromising the flavor. Additionally, you can experiment with various nut butters such as sunflower seed butter or tahini to create deliciously nut-free truffles.
Vegan-friendly truffle ingredients and techniques
To make vegan truffles, you’ll need to make a few ingredient substitutions. Opt for dairy-free chocolate, which is widely available and comes in a variety of flavors and formulations. Use plant-based milk alternatives like almond milk, coconut milk, or oat milk instead of dairy cream in your filling. Agave syrup, maple syrup, or coconut nectar can be used as sweeteners instead of honey. As for coating and decorations, choose vegan-friendly options like cocoa powder, shredded coconut, or dairy-free chocolate shavings.
Presentation and Packaging
How to showcase your truffles
Presentation is an important aspect of enjoying and gifting homemade truffles. Consider serving them on a beautiful platter or dessert tray during gatherings to treat your guests. Choose a visually appealing presentation that highlights the truffles’ colors and decorations. You can also arrange them on individual dessert plates with a dusting of powdered sugar and a sprig of fresh mint for an elegant touch. Remember, the first bite is with the eyes, so make sure your truffles look as enticing as they taste!
Ideas for gift packaging and presentations
If you’re planning to gift your truffles, packaging them creatively adds an extra touch of thoughtfulness. Place the truffles in decorative paper cups or mini cupcake liners before arranging them in a gift box lined with tissue paper. You can also wrap each truffle individually in colorful foil or place them in small cellophane bags tied with ribbons. Don’t forget to include a handwritten note or a tag with the flavor names to guide the recipient’s tasting journey.
Labeling and storing for gift giving
When gifting your homemade truffles, labeling them with flavor names or descriptions is a helpful detail. You can create simple handwritten labels or print small tags with the information. If you’re gifting a variety of flavors, consider including a flavor guide or a menu to help the recipient navigate through the different truffles. Additionally, ensure the truffles are stored properly in an airtight container to maintain their freshness until they’re ready to be enjoyed.
Advanced Techniques
Incorporating textures and fillings into truffles
Once you’ve mastered the basics of truffle making, you can start exploring advanced techniques to add even more excitement to your creations. Consider incorporating different textures into your truffle centers, such as crunchy praline, crispy rice cereal, or chewy dried fruit. You can also experiment with fillings that have various layers, such as a fruit compote inside a ganache filling or a caramel core surrounded by a chocolate shell. These techniques will elevate your truffles and amaze your taste buds.
Mastering complex chocolate decorations
If you’re looking to take your truffles to the next level, mastering complex chocolate decorations is the way to go. This can include techniques like hand-painting designs or images on the truffle surface using food-safe cocoa butter paints. You can also try creating intricate chocolate curls, delicate chocolate flowers, or even personalized chocolate monograms. With practice and patience, you’ll become skilled at these decorative techniques, transforming your truffles into true works of art.
Exploring Other Confections
Expanding your repertoire beyond truffles
While truffles are undoubtedly delightful, exploring other confections can broaden your culinary repertoire and offer even more delicious treats. Consider trying your hand at making chocolate-covered strawberries, caramel-filled chocolates, or homemade fudge. Experiment with different flavors and textures to create an assortment of confections that will delight and impress your friends and family. The world of chocolate confections is vast, and there are endless opportunities for creativity and indulgence.
Simple recipes for other chocolate treats
If you’re eager to try your hand at making other chocolate treats, here are a few simple recipes to get you started:
-
Chocolate-Covered Strawberries: Melt your favorite chocolate, dip fresh strawberries into it, and let them set on wax paper until the chocolate hardens. Perfect for a romantic dessert or a sweet addition to any gathering.
-
Caramel-Filled Chocolates: Make a caramel filling by melting caramels with heavy cream, then pour the mixture into silicone molds or create small caramel balls. Dip the caramel centers into melted chocolate and let them set. Deliciously chewy and decadent!
-
Homemade Fudge: Combine sweetened condensed milk, chocolate chips, and a pinch of salt in a saucepan. Heat and stir until the mixture is smooth and well combined. Pour into a parchment-lined dish, let it set, and cut into bite-sized squares. Creamy and rich, fudge is a classic treat for any occasion.
With these simple recipes and a little creativity, you’ll be on your way to becoming a master of various chocolate confections, impressing everyone with your homemade treats.
In conclusion, making chocolate truffles at home like a pro is an enjoyable and rewarding endeavor. By choosing the right chocolate, selecting the perfect fillings, and utilizing essential equipment, you’ll be well on your way to creating delicious truffles that rival those found in upscale chocolatier shops. Understanding the importance of tempering chocolate and following the tips for successful tempering will ensure your truffles have the perfect texture and appearance. The process of preparing the filling, shaping the truffle centers, coating them in chocolate, and adding the finishing touches will transform your homemade truffles into elegant and delectable treats. By exploring various flavor variations, trying nut-free and vegan options, and presenting your truffles beautifully, you can cater to a wide range of preferences and occasions. Don’t be afraid to delve into advanced techniques and experiment with other chocolate confections to continue expanding your culinary skills. With practice and passion, you’ll soon be known for your exquisite homemade truffles, delighting friends, family, and yourself with these indulgent treats. So go ahead, gather your equipment and ingredients, follow the step-by-step instructions, and enjoy the journey of creating chocolate truffles like a pro!


