
Have you ever wondered how those delicious chocolate bars are made? Well, wonder no more! In this article, we will take you on a step-by-step journey on how to make your very own chocolate bars from scratch. From selecting the perfect cocoa beans to tempering the chocolate, we will guide you through the entire process, ensuring that with a little bit of time and patience, you can create mouthwatering chocolate bars that are truly one-of-a-kind. So put on your apron and get ready to indulge in the sweet world of homemade chocolate!

Choosing the Right Ingredients
Selecting high-quality cocoa beans
When it comes to creating delicious chocolate bars, the first step is to choose the right ingredients. High-quality cocoa beans are the foundation of any great chocolate bar. Look for beans that are sourced from reputable suppliers and have been properly fermented and dried. Pay attention to the variety of cocoa bean used, as different varieties can result in varying flavors and profiles.
Choosing the right sweetener
Next, it’s essential to select the right sweetener for your chocolate bars. While sugar is the most common sweetener used in traditional chocolate, there are also alternative options available such as honey, maple syrup, or coconut sugar. Consider experimenting with different sweeteners to find the perfect balance of sweetness for your taste preferences.
Using premium cocoa butter
Cocoa butter is a crucial ingredient in chocolate bars as it provides a smooth and creamy texture. Ensure that you are using high-quality cocoa butter that has been properly extracted from the cocoa beans. Look for cocoa butter with a rich aroma and a smooth melting point to achieve the best results in your homemade chocolate bars.
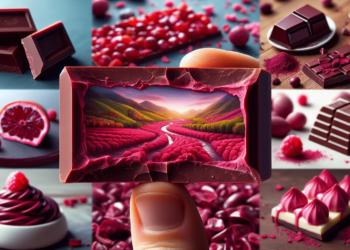
Adding flavorings and fillings
To create unique and flavorful chocolate bars, consider adding additional flavorings and fillings. You can infuse the melted chocolate with various flavors such as vanilla, coffee, or citrus zest. Additionally, you can experiment with different fillings such as nuts, dried fruits, or candies to add texture and enhance the taste of your chocolate bars.
Roasting and Grinding Cocoa Beans
Overview of the roasting process
Roasting the cocoa beans is a crucial step in the chocolate-making process as it develops the rich flavors and aromas. Start by preheating your oven to the recommended temperature, typically around 250-300°F. Spread the cocoa beans evenly on a baking sheet and place them in the oven for about 20-30 minutes, stirring occasionally. The roasted cocoa beans should have a deep, chocolatey aroma and they should be easy to crack.
Cracking and winnowing the beans
Once the cocoa beans are roasted, it’s time to crack them and remove the outer husk. You can use a nutcracker or a small hammer to crack the beans. After cracking, winnow the beans by gently blowing or using a fan to remove the husk, separating the cocoa nibs.
Grinding the cocoa nibs
Grinding the cocoa nibs is where the transformation from cocoa to chocolate begins. You can use a dedicated cocoa grinder or a high-powered blender to grind the nibs into a smooth, liquid called cocoa liquor. The heat generated during the grinding process helps to release the cocoa butter within the nibs, resulting in a silky texture.
Conching the chocolate
Conching is a process that involves mixing and heating the cocoa liquor to further develop the flavor and texture of the chocolate. You can use a conching machine or manually conch the chocolate by continuously stirring it with a spatula or whisk. This process can take several hours or even days, depending on the desired outcome. Be patient and continue to stir until the chocolate reaches the desired smoothness and flavor.
Tempering the Chocolate
Importance of tempering
Tempering is a crucial step in chocolate-making that ensures the chocolate has a shiny appearance, a crisp snap, and a smooth texture. It involves heating and cooling the chocolate to specific temperatures to stabilize the cocoa butter crystals. Properly tempered chocolate will have a glossy finish and will not melt easily at room temperature.
Using a double boiler
To temper the chocolate, you will need a double boiler setup. Fill the bottom pot with water and place it over low heat. Place the chocolate in the top pot or bowl, making sure it does not come into direct contact with the water. Gently melt the chocolate, stirring occasionally until it reaches the desired temperature.
Measuring and heating the chocolate
To properly temper the chocolate, it’s important to measure and heat it to specific temperatures. The exact temperatures may vary depending on the type of chocolate you are using, but generally, you will need to heat the chocolate to around 115-120°F for dark chocolate, 105-110°F for milk chocolate, and 95-100°F for white chocolate.
Cooling and reheating
After reaching the desired temperature, cool the chocolate by stirring it continuously until it reaches a lower temperature. For dark chocolate, cool it to around 80-85°F, for milk chocolate, cool it to around 80°F, and for white chocolate, cool it to around 75-80°F. Once cooled, you may need to briefly reheat the chocolate to the desired working temperature before pouring it into the molds.
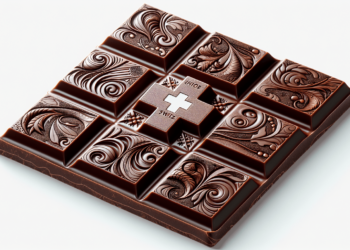
Molding the Chocolate Bars
Preparing the chocolate molds
Before pouring the tempered chocolate, make sure to prepare the chocolate molds. Clean and dry the molds thoroughly to ensure the chocolate bars will be released easily. You can also use a pastry brush to add a thin layer of cocoa butter to the molds for a glossy finish.
Pouring the tempered chocolate
Carefully pour the tempered chocolate into the prepared molds, making sure to fill each cavity evenly. Gently tap the molds on the countertop to remove any air bubbles that may have formed. You can also use an offset spatula or a bench scraper to smooth the surface of the chocolate bars.
Tapping and scraping excess chocolate
After pouring the chocolate, tap the molds again to ensure that all air bubbles have been released. Then, use a bench scraper or a straight edge to scrape off any excess chocolate from the top of the molds. This will create clean edges for your chocolate bars.
Decorating the bars
If desired, you can decorate the chocolate bars before they fully set. Sprinkle them with toppings such as chopped nuts, dried fruits, or a sprinkle of sea salt. You can also drizzle melted white or dark chocolate on top for an elegant finishing touch. Be creative and experiment with different decorations to enhance the appearance of your homemade chocolate bars.

Adding Flavors and Fillings
Infusing flavors into the melted chocolate
To add exciting flavors to your chocolate bars, you can infuse the melted chocolate with various ingredients. For example, you can steep herbs or spices in hot cream and then strain it before adding it to the melted chocolate. Alternatively, you can use flavored extracts or oils to enhance the taste of your chocolate. The possibilities are endless, so don’t be afraid to experiment and discover new flavor combinations.
Creating exciting combinations
When it comes to filling your chocolate bars, the options are limitless. Consider combining different flavors and textures to create exciting combinations. For example, you can pair dark chocolate with dried cherries and almond pieces, or milk chocolate with caramel and sea salt. Let your taste buds guide you and have fun exploring different flavor profiles.
Adding nuts, dried fruits, or candies
Nuts, dried fruits, and candies can add a delightful crunch and burst of flavor to your chocolate bars. Chop your favorite nuts such as almonds, hazelnuts, or peanuts and sprinkle them onto the melted chocolate before it sets. You can also mix dried fruits such as cranberries, apricots, or raisins into the chocolate. Additionally, candies such as caramel pieces or toffee bits can provide a sweet and gooey surprise inside your homemade chocolate bars.
Experimenting with spices and herbs
Spices and herbs can add a unique twist to your chocolate bars. Consider incorporating spices like cinnamon, cardamom, or chili powder to create a subtle warmth or a spicy kick. Fresh or dried herbs such as lavender, mint, or basil can also infuse your chocolate bars with a refreshing and aromatic flavor. Don’t be afraid to think outside the box and experiment with different spice and herb combinations to create your own signature chocolate bars.
Creating Unique Chocolate Bar Recipes
Exploring different cacao percentages
Exploring different cacao percentages allows you to customize the intensity and flavor of your chocolate bars. Dark chocolate typically has higher cacao percentages, ranging from 50% to 100%, resulting in a rich and intense flavor. Milk chocolate usually has lower cacao percentages, around 30% to 40%, offering a creamier and sweeter taste. Experiment with different cacao percentages to find the perfect balance for your own unique chocolate creations.
Mixing white, milk, and dark chocolate
Why stick to just one type of chocolate when you can combine different varieties to create a complex and flavorful chocolate bar? Mixing white, milk, and dark chocolate can result in a harmonious blend of sweetness, creaminess, and depth of flavor. Try layering different types of chocolate or swirling them together for visually stunning and delicious chocolate bars.
Incorporating unique ingredients
To create truly unique and innovative chocolate bars, consider incorporating unusual ingredients into your recipes. From exotic spices like saffron or matcha powder to unexpected ingredients like bacon or lavender, the possibilities are endless. Be adventurous and embrace your creativity to develop extraordinary flavors that will captivate the taste buds of anyone who tries your homemade chocolate bars.
Developing your signature flavor
As you gain more experience in making chocolate bars, you may discover a flavor combination or a unique ingredient that becomes your signature flavor. This signature flavor can set your chocolate bars apart and become a defining characteristic. Embrace your individuality and continue to experiment and refine your recipes until you find your own special touch that will make your homemade chocolate bars truly stand out.
Wrapping and Storing Chocolate Bars
Selecting appropriate wrapping materials
To ensure your chocolate bars stay fresh, it’s important to select appropriate wrapping materials. Look for food-grade packaging that provides a barrier against moisture, air, and light. Consider using high-quality foil or heat-sealable bags that can provide a tight seal and protect the chocolate bars from external elements that may affect their flavor and texture.
Using heat-sealable bags or foil
Heat-sealable bags or foil offer a convenient way to wrap your chocolate bars securely. Place each chocolate bar in its own bag or wrap it tightly in foil, ensuring there are no gaps or openings. Use a heat sealer or a flat iron set on a low heat setting to seal the bags, or fold and crimp the foil to create a tight seal. This will help preserve the freshness and quality of your homemade chocolate bars.
Ensuring proper cooling and hardening
Allow your chocolate bars to cool and harden completely before wrapping them. This process can take several hours, depending on the temperature and humidity of your environment. Avoid touching or moving the chocolate bars too soon, as this may leave fingerprints or damage the delicate surface. Patience is key when it comes to achieving perfectly wrapped and protected chocolate bars.
Optimal storage conditions
To maintain the quality and flavor of your chocolate bars, it’s important to store them properly. Keep them in a cool and dry place, ideally at a temperature between 60-70°F. Avoid storing them in the refrigerator, as this can cause moisture condensation and affect the texture and taste of the chocolate. When stored correctly, your homemade chocolate bars can last for several weeks or even months.
Troubleshooting Common Chocolate-Making Issues
Understanding chocolate seizing
Chocolate seizing is a common issue that occurs when the chocolate comes into contact with even a small amount of moisture. It causes the chocolate to become thick, lumpy, and grainy. To prevent seizing, make sure all utensils and equipment are completely dry before working with chocolate. If seizing does occur, you can attempt to save the chocolate by adding a small amount of vegetable oil or cocoa butter and gently melting it until it becomes smooth again.
Dealing with blooming or streaking
Blooming or streaking refers to the white or grayish streaks that can appear on chocolate bars. This is caused by fat or sugar molecules migrating to the surface of the chocolate and crystallizing. While blooming doesn’t affect the taste of the chocolate, it can affect its appearance. To prevent blooming, ensure that the chocolate is properly tempered and cooled before it is poured into the molds. Store the chocolate bars in a cool and dry place to minimize the chances of blooming.
Resolving issues with tempering
Tempering can be a challenging process, and it’s not uncommon to encounter issues along the way. If you find that your chocolate is not tempering correctly or has a streaky or dull appearance, don’t be discouraged. Try adjusting the temperature and timing during the tempering process. You can also use a chocolate thermometer to ensure precision and accuracy. With practice and experimentation, you will develop the skills and knowledge needed to master the art of tempering chocolate.
Solutions for gritty or grainy texture
A gritty or grainy texture in your chocolate bars may indicate that the chocolate has not been properly ground or conched. To fix this issue, you can try re-grinding the cocoa nibs or conching the chocolate for a longer duration. The heat generated during the conching process helps to refine the chocolate and create a smoother texture. Ensure that you are using high-quality cocoa beans and equipment to achieve the best results in terms of texture.
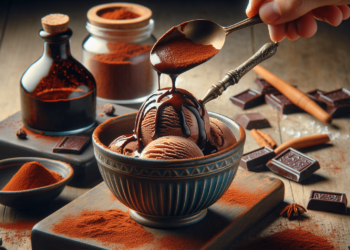
Exploring Health Benefits of Homemade Chocolate Bars
The nutritional value of cocoa
Cocoa is not only a delicious treat but also packed with beneficial nutrients. It is a rich source of antioxidants, which help protect the body against free radicals and reduce oxidative stress. Cocoa also contains minerals like magnesium, iron, and zinc, as well as essential vitamins such as thiamine and riboflavin. Consuming homemade chocolate bars made with high-quality cocoa can be a nutritious addition to your diet.
Antioxidant and mood-enhancing effects
The antioxidants found in cocoa have been shown to have numerous health benefits. They can help improve cardiovascular health, lower blood pressure, and reduce the risk of chronic diseases. Additionally, cocoa contains compounds that stimulate the production of endorphins and serotonin in the brain, which can contribute to a sense of well-being and promote a positive mood.
Reducing sugar and additives
By making your own chocolate bars, you have control over the ingredients and can reduce the amount of sugar and additives used. Commercial chocolate bars often contain high amounts of added sugar and artificial additives. By using alternative sweeteners and high-quality ingredients, you can create healthier versions of chocolate bars that are lower in sugar and free from unnecessary additives.
Customizing the chocolate for dietary needs
Another advantage of homemade chocolate bars is the ability to customize them to meet specific dietary needs. If you have dietary restrictions or preferences, such as following a vegan, gluten-free, or dairy-free diet, you can adapt the ingredients accordingly. There are numerous plant-based options available, such as using coconut oil instead of butter or using nut milk instead of dairy milk. This allows you to enjoy chocolate bars that suit your individual needs and preferences.
Sharing and Gifting Your Homemade Chocolate Bars
Packaging and labeling tips
When it comes to sharing or gifting your homemade chocolate bars, packaging and labeling play an important role. Choose attractive packaging that showcases the chocolate bars and protects them from damage. Consider using clear cellophane bags or decorative boxes. Label each chocolate bar with its flavor, ingredients, and any allergen information to ensure that recipients are aware of what they are enjoying.
Creating personalized chocolate gifts
Homemade chocolate bars make for wonderful personalized gifts. Consider adding a personal touch by incorporating themed decorations, such as holiday-themed sprinkles or edible gold dust for a special occasion. You can also create custom labels or tags with the recipient’s name or a heartfelt message. Personalized chocolate gifts are not only delicious but also demonstrate thoughtfulness and care.
Selling homemade chocolate bars
If you have a passion for chocolate-making, you may consider selling your homemade chocolate bars. Before venturing into selling, ensure that you comply with local laws and regulations regarding food preparation and labeling. Develop a pricing strategy that takes into account the cost of ingredients and packaging, as well as labor and overhead expenses. Market your homemade chocolate bars through local artisan markets, online platforms, or even starting your own small business.
Sharing your chocolate-making expertise
Finally, don’t keep your chocolate-making expertise to yourself! Share your knowledge and skills with others who may be interested in making their own chocolate bars. Consider hosting workshops or classes where you can teach others the art of chocolate-making. You can also create a blog or social media platform to share your tips, recipes, and experiences. By spreading the joy of homemade chocolate, you can inspire and empower others to explore their creativity in the kitchen.
In conclusion, making your own chocolate bars from scratch is a rewarding and enjoyable process. By choosing high-quality ingredients, mastering the techniques of roasting, grinding, tempering, and molding, and adding unique flavors and fillings, you can create delicious and personalized chocolate bars that are sure to impress. Whether you are making chocolate bars for yourself, sharing them with loved ones, or even selling them, the possibilities are endless. Embrace your creativity, experiment with different ingredients and techniques, and have fun on your chocolate-making journey.

